How to Track Engagement in Continuous Improvement Program
Background:
One of the measures of a successful Continuous Improvement program is employee engagement. One way that you can measure employee engagement in continuous improvement efforts is to track of who is participating by providing ideas for improvement as well as those who are involved in working improvement projects such as DMAIC, PDCA, KAIZEN, JDI, and more. Keeping track of this employee engagement is now even easier in KPI Fire.
Problem
Some KPI Fire customers have been using text fields on project charters to keep track of project team members who are not users in KPI Fire. This was typically done to avoid paying for user licenses or to avoid setting up users who did not need access to KPI fire. This works for the project charter, but it fails to help you see all of the people who are involved in your Continuous Improvement efforts.
Solution:
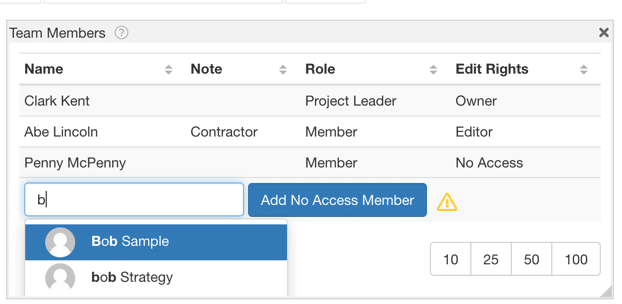
KPI Fire now offers a ‘no-access’ license type. This allows project leaders to add all members of an improvement project team to the project. By doing this, you can get more accurate reports for your Team Engagement report.
- There is no additional cost for these “no-access” license type users.
Note: The best way to take advantage of this new feature is to add the Team tile to your project charters, and workflows.
Instructions
Project leaders can add team members from the Team tab, or via the Team tile if added to the project charter.
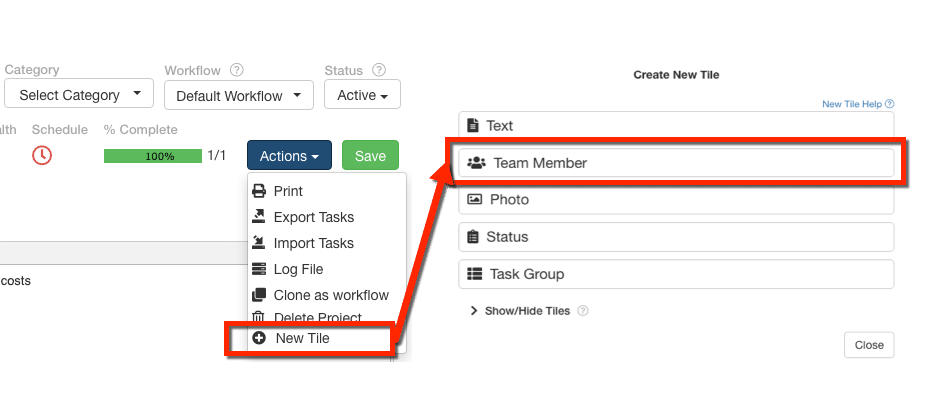
How to add the Team tile to Project Charter
- Must be the Project Leader, or Admin user.
- Go to Project Charter Tab. Click Actions.
- Select New Tile, select “Team Member”.
- The New Tile will be added to bottom of page. You can drag/drop it to the desired position.
Note: if workflow layout is “locked” the admin user may need to unlock layout first.
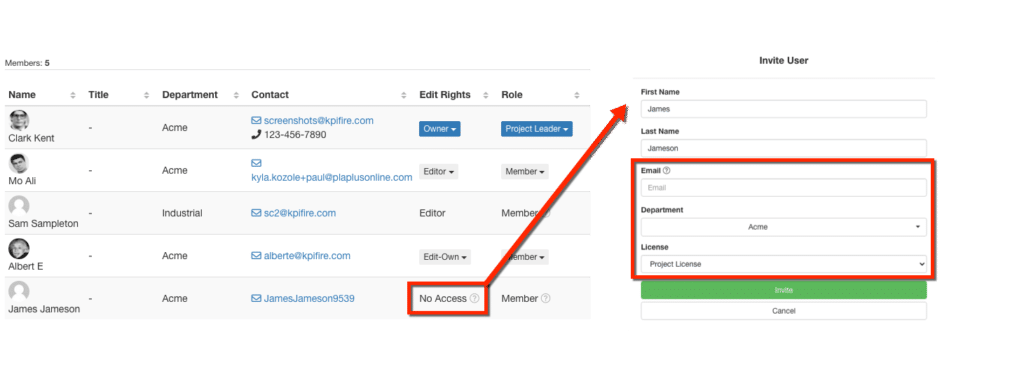
Changing a No-Access user to a full access user
Note: if the User can be an editor or owner you will see that option in the dropdown menu.
Project Leaders have the ability to configure the Access & Edit rights of the team members.
- For User with Editor Rights, Go to Team Tab.
- Click the “No Access” value in the Edit Rights column for the desired user.
- Enter an email address, License Type, and select the appropriate Department. Click Invite
Notes:
- Admin users have a setting which allows users to invite other users.
- If your account requires Single Sign On (SSO), additional steps may be required.


